How To Adjust Holosun Red Dot – Settings And Zeroing Guide
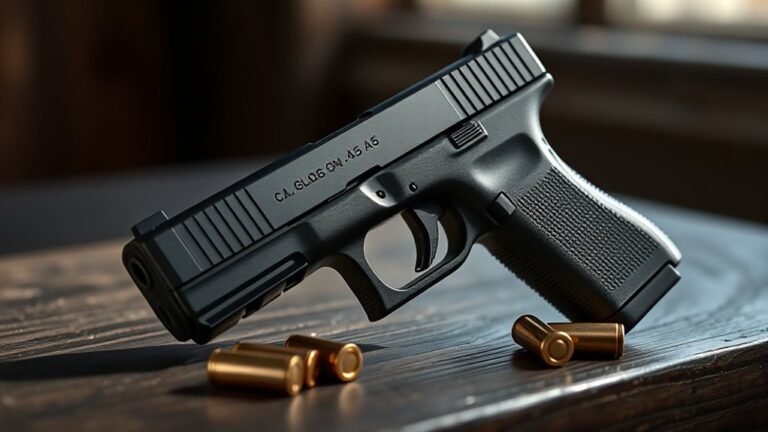
To adjust your Holosun red dot, first securely mount it using thread locker and tighten screws to 15 in-lbs. Zero your sight at 10 yards on a stable rest by firing groups and adjusting windage and elevation turrets in small clicks.
Use the “+” and “–” buttons to set brightness, locking settings to prevent accidental changes. Regularly check mount stability and re-zero after impacts to maintain accuracy.
Follow these steps closely, and you’ll improve precision and reliability effortlessly. It’s all about taking your time and making sure everything is snug and properly aligned.
Key Takeaways
- Mount the Holosun red dot securely with thread locker and torque screws to 15 in-lbs for stable zero retention.
- Zero the optic by shooting from a stable rest at 10 yards, then adjust windage and elevation turrets in 1 MOA increments.
- Adjust brightness using “+” and “–” buttons, hold “+” for 3 seconds to enter or exit lockout mode.
- Use lockout mode to prevent accidental brightness changes during use or transport.
- Regularly check and tighten mounting hardware, and re-zero after removal or impacts to maintain accuracy.
Mount Your Holosun Red Dot Securely
How do you guarantee your Holosun red dot stays firmly in place? First, mount the optic on a rail or mount compatible with your firearm. Make sure the mounting surface is clean and free of debris to provide a secure foundation.
Next, apply a small amount of non-permanent thread locker, like Loctite or Vibra-tite, to the screws before installation to prevent loosening.
Use spacers if needed to achieve a flush, level fit.
Tighten the mounting screws precisely to 15 in-lbs using a torque wrench. This prevents over-tightening or stripping while securing the sight firmly.
Finally, confirm the optic aligns properly with the bore and sits stable on the mount.
Following these steps guarantees your Holosun red dot stays secure and reliable during use. It’s a simple process, but taking the time means your sight won’t budge when you need it most.
How to Shoot Steady When Zeroing Your Holosun Red Dot
When zeroing your Holosun red dot, maintaining a steady shooting position is essential to achieving accurate adjustments. Start by using a stable shooting platform like a bench rest or sandbags to minimize movement. Keep your elbows tucked and grip firm to reduce body sway.
Maintaining a steady shooting position with a stable platform and firm grip ensures precise zeroing adjustments.
Focus on slow, deliberate trigger pulls instead of rapid firing to avoid jerking the firearm and disrupting your aim. Make sure the firearm is securely supported and your sight picture stays consistent between shots.
Take multiple shots at each adjustment point, allowing the rifle to settle between shots for precise zeroing.
Following these steps will help you maintain a steady setup. This makes your zeroing process more efficient and accurate.
Set Your Initial Zero at 10 Yards (Holosun Red Dot)

Start by securing your Holosun red dot on a stable rest and aiming at a target with a clear center mark at 10 yards.
Go ahead and fire a tight 3-5 shot group to see how accurate you’re initially.
Once you’ve done that, check how far your shots are off from where you were aiming.
Then, use the turret clicks to make precise adjustments to windage and elevation.
Keep tweaking until your impact matches your sight picture perfectly.
Preparing For Zeroing
Although zeroing your Holosun red dot sight might seem straightforward, setting your initial zero at 10 yards provides a reliable baseline for accurate adjustments. To prepare, use a stable platform like a bench or sandbags, ensuring consistent positioning.
Fire a 3- to 5-shot group at 10 yards to establish your point of impact. Measure the group’s deviation from center to determine windage and elevation adjustments. Then, make small, incremental changes to your sight.
| Step | Action | Purpose |
|---|---|---|
| 1 | Set target at 10 yards | Establish initial zero distance |
| 2 | Stabilize firearm | Ensure consistent shot placement |
| 3 | Fire 3-5 shots | Create shot group for analysis |
| 4 | Measure deviation | Identify adjustment needs |
| 5 | Adjust windage/elevation | Zero the red dot sight |
Shooting Group Accuracy
Because accuracy hinges on consistent shot placement, shooting a tight 3- to 5-shot group at 10 yards is essential for setting your Holosun red dot’s initial zero.
Start by securing your firearm on a stable rest to minimize human error and guarantee repeatable shot placement.
Focus on producing a precise shooting group, then carefully measure the group’s deviation from the target center.
This measurement guides your windage and elevation adjustments during zeroing.
Zeroing at 10 yards simplifies corrections by accounting for bullet drop and sight offset early in the process.
Establishing this solid foundation improves your sight’s performance at longer distances.
Stay methodical. Consistent shooting groups at this range are critical for an accurate, reliable zero with your Holosun red dot.
Adjusting Impact Point
Once you’ve established consistent shot groups at 10 yards, it’s time to adjust your Holosun red dot to align the impact point with your aim. Set up a stable shooting platform and aim precisely at your target center.
Fire 3-5 shots and carefully observe where the rounds impact relative to your point of aim.
Use the Holosun’s windage and elevation controls to make small, deliberate adjustments, shifting the impact point toward the target’s center.
This zeroing process at 10 yards creates a reliable baseline zero, ensuring your red dot is accurately calibrated before moving to longer ranges.
By methodically adjusting the impact point early, you’ll build a solid foundation for precision and confidence with your Holosun sight.
It’s all about setting yourself up right from the start, so you can trust your sight when it really counts.
Adjust Windage and Elevation on Your Holosun Red Dot
When you adjust the windage and elevation on your Holosun red dot, you control where your shots land by turning the respective knobs. Turn the windage knob clockwise to shift impact right, counterclockwise to move it left. For elevation, clockwise raises the impact point; counterclockwise lowers it.
Each click moves the point roughly 1 MOA (1 inch at 100 yards). Fire groups, note impacts, then adjust 1-2 clicks at a time. Use a stable rest to maintain consistency. Record clicks to replicate your zero reliably.
| Adjustment | Turn Clockwise | Turn Counterclockwise |
|---|---|---|
| Windage | Move impact right | Move impact left |
| Elevation | Raise point of impact | Lower point of impact |
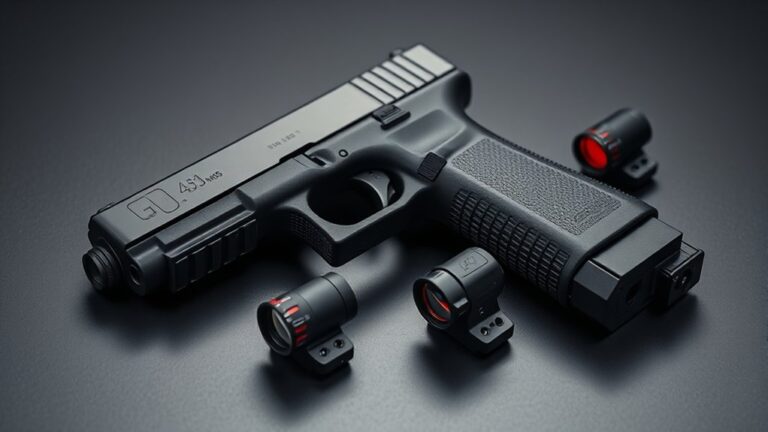
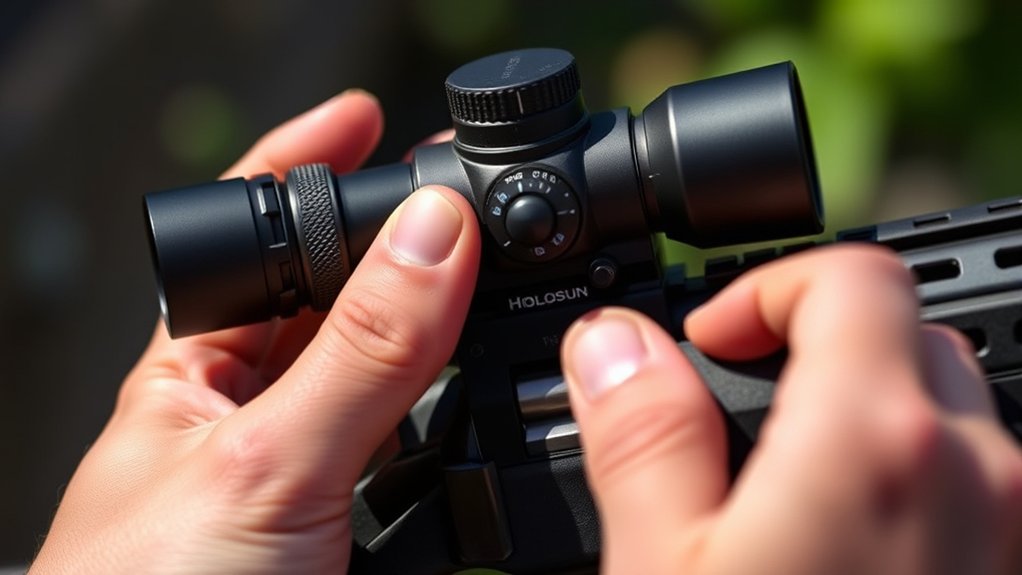
Adjust Brightness Modes on Holosun Red Dots
You can easily switch between Auto, Manual, and Lockout brightness modes on your Holosun red dot to match different lighting conditions. Just use the “+” and “–” buttons to adjust the brightness to your liking.
If you want more precise control, hold the “+” button for 3 seconds to enter Manual mode. This way, you can fine-tune the brightness exactly how you want it.
And if you’re worried about accidentally changing your settings, Lockout mode has you covered. It disables any adjustments and keeps your brightness fixed, so you don’t have to worry about any unwanted changes.
Brightness Mode Types
Although Holosun red dots come with varying brightness mode options, it’s essential to know which modes your model supports for the best adjustment.
Solar models include Auto, Manual, and Lockout modes. Non-solar models generally offer only Manual and Lockout.
You can use the “+” and “–” buttons to adjust brightness incrementally.
To switch between brightness modes, just press and hold the “+” button for a few seconds.
In Auto mode, the red dot automatically adapts brightness to ambient light, so you get maximum visibility without needing to adjust anything.
Manual mode lets you control brightness levels directly.
Lockout mode prevents any brightness changes and locks the current setting until you switch back to Auto or Manual.
Knowing these modes helps you maintain maximum sight performance in different lighting conditions.
It’s pretty handy to be familiar with them so your sight works perfectly whenever you need it.
Switching And Lockout
Since adjusting brightness modes directly impacts your sight’s performance, mastering the switching and lockout functions on Holosun red dots is essential.
To switch brightness modes, press and hold the “+” button for about 3 seconds to enter manual mode. This overrides the default auto mode that adjusts brightness based on ambient light.
If you need to prevent accidental changes, activate lockout mode by holding both the “+” and “–” buttons simultaneously. This locks the current brightness setting, ensuring consistent sight clarity.
To exit lockout mode and return to auto mode, simply hold the “+” button again for 3 seconds.
Pay attention to the LED status indicator because it confirms your brightness mode changes.
Utilizing these functions helps you maintain the most suitable sight performance under varying operational conditions. It’s a simple way to keep your sight working just right whenever you need it.
Use Lockout Mode to Secure Brightness Settings
When you want to prevent accidental changes to your Holosun red dot’s brightness, activate Lockout mode. This feature disables the adjustment buttons, securing your brightness settings during critical moments or transport.
To engage Lockout mode, hold the “+” button for 3 seconds until the brightness indicator stops changing.
Hold the “+” button for 3 seconds to activate Lockout mode and secure your brightness setting.
Once active, pressing the “+” or “–” buttons won’t affect brightness settings.
To recap, Lockout mode prevents unintended brightness adjustments. It’s activated by holding the “+” button for 3 seconds. You can disengage it the same way to regain brightness control.
Use Lockout mode to maintain consistent brightness settings and make sure your sight stays reliable when you need it most.
Maintain Zero and Mount Stability (Holosun Red Dot)
To maintain zero and mount stability on your Holosun red dot, regularly check and tighten the mounting screws to the recommended 15 in-lbs torque. Applying blue thread locker during installation helps prevent screws from loosening under recoil.
Make sure the optic is mounted correctly and perfectly level with your firearm to keep zero stable during use.
It’s a good idea to inspect the mounting hardware for any wear, corrosion, or loosening, especially after heavy shooting sessions or impacts.
If you ever remove and remount the optic, always re-zero it to make sure your zero stays accurate and consistent.
Troubleshoot Zeroing and Adjustment Issues
If your Holosun red dot isn’t zeroing properly or adjustments feel off, start by confirming that all mounting screws are tightened to the specified 15 in-lbs with thread locker applied. Loose hardware often causes zero shifts.
Next, make sure the optic is securely mounted and aligned with your firearm’s bore to avoid inconsistent impact points.
Ensure your optic is firmly mounted and perfectly aligned with your bore for consistent accuracy.
It’s a good idea to regularly re-zero your optic after dismounting or any impacts to keep your accuracy on point.
When troubleshooting zeroing and adjustment issues, focus on verifying windage and elevation turret function. Make sure the clicks correspond to 1 MOA per turn.
Also, use a stable shooting platform to reduce human error during zeroing.
Don’t forget to check for zero drift caused by recoil or environmental factors. Following these steps will help you maintain precise zeroing and reliable adjustment performance.
Frequently Asked Questions
What Battery Type and Life Expectancy Does a Holosun Red Dot Have?
You’ll find Holosun red dots use CR2032 lithium batteries, which are easy to replace and widely available. Depending on your model and brightness settings, expect battery life between 50,000 to 100,000 hours.
If you have a solar-powered model with Solar Failsafe technology, it’ll extend battery life by using ambient light. That’s pretty handy for keeping your sight powered longer without constantly swapping batteries.
To keep your sight performing at its best, check and replace batteries regularly, especially if you notice dimming or power loss. It’s a simple step that makes a big difference.
Can I Use My Holosun Red Dot in Low-Light or Night Conditions?
Yes, you can use your Holosun red dot in low-light or night conditions. Just adjust the brightness settings to suit the environment. Most models offer manual and auto-brightness modes that adapt to darkness.
If you have a solar model, it automatically optimizes brightness.
Increasing the brightness guarantees the reticle remains visible. This helps you acquire targets quickly and accurately when light is scarce.
Always check and adjust before shooting in low-light. It’s a simple step that makes a big difference.
How Do I Clean and Care for the Holosun Lens Without Damage?
Don’t throw the baby out with the bathwater. Clean your Holosun lens gently. Use a soft, lint-free microfiber cloth with a tiny drop of lens cleaner or distilled water on it. Never spray the lens directly.
Wipe in a circular motion from the center outward. Avoid harsh chemicals or abrasive materials that can damage the coatings. It’s all about being gentle with this delicate surface.
Inspect the lens regularly, and make sure to store the optic in a protective case. Handle it like the precision tool it really is.
Taking these small steps goes a long way in keeping your lens clear and functional.
Are Holosun Red Dots Compatible With Night Vision Devices?
Yes, some Holosun red dots are compatible with night vision devices, but you need to verify your model supports NV mode.
You’ll want to set the brightness to a low level designed for night vision to avoid glare or damage.
Always check your optic’s specifications and user manual to confirm compatibility.
If your Holosun has an NV mode, activate it for peak performance with night vision gear.
What Warranties or Customer Support Does Holosun Offer for Their Red Dots?
Holosun offers a limited 3-year warranty that covers defects in materials and workmanship for their red dots.
You can register your product online, which might help extend your coverage and speed up service if you ever need it.
If you run into any issues, just reach out to Holosun’s customer support through their website or authorized dealers.
They can help with troubleshooting, repairs, or replacements.
They really prioritize customer satisfaction and product reliability, so you’ll get the help you need quickly and efficiently.
Conclusion
You’ve mounted it, steadied your shot, and zeroed your Holosun red dot like a pro. But then you realize the toughest part is keeping it that way. Adjusting windage and elevation was straightforward, but maintaining zero? That’s the real challenge.
Don’t forget to lock those brightness settings. Otherwise, you might find yourself adjusting in the dark—literally. Follow these steps, and your red dot will stay true long after you think you’ve mastered it.