How To Zero A Red Dot Without Shooting – Practical Methods Explained
To zero your red dot without shooting, firmly secure your firearm on a stable rest and use a laser bore sighter to project a precise point of aim at a known-distance target. Adjust the windage and elevation screws until the reticle aligns perfectly with the laser dot.
Alternatively, remove the bolt for visual boresighting and center the reticle on a close target. Maintain consistent posture and balance your vision for accuracy.
Follow these steps closely, and you’ll be prepared for fine-tuning at the range. It’s a simple way to get started without firing a single shot.
Key Takeaways
- Secure the firearm on a stable rest and use a laser bore sight to align the red dot reticle with a target at a known distance.
- Adjust windage and elevation screws until the red dot matches the laser dot horizontally and vertically on the target.
- Remove the bolt for visual boresighting, aligning the red dot reticle with a distant reference target through the barrel.
- Verify scope mounting is secure and inspect for debris or loose parts before adjusting the sight.
- Balance vision by keeping both eyes open and maintain consistent posture for accurate reticle alignment without live firing.
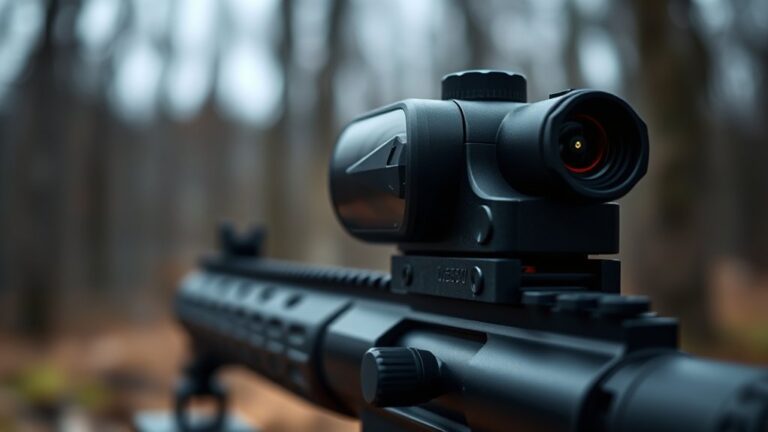
What Is a Red Dot Sight and How Does It Work?
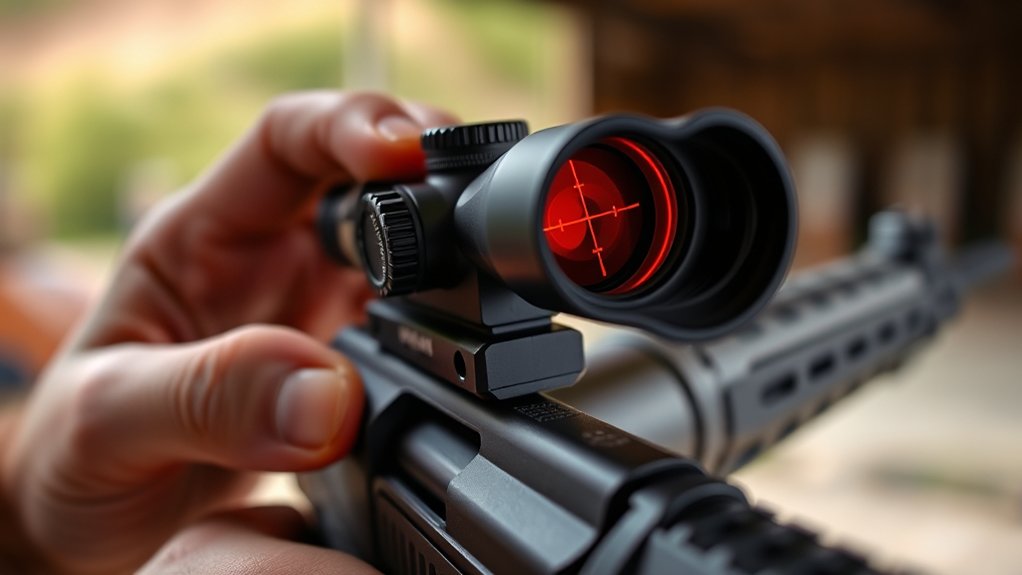
How does a red dot sight help you aim faster and more accurately? A red dot sight projects an illuminated reticle, typically a bright red dot, onto a coated glass lens using an LED reflector system. This setup ensures quick targeting and precise aiming without requiring eye relief.
So, you can maintain focus on your target effortlessly. The reticle shapes vary, including single dots, circles, or crosses. You can often adjust these to suit your preference.
The dot size, measured in MOA (Minutes of Angle), influences how precisely you can engage targets. Smaller MOA means finer accuracy, while larger MOA improves visibility.
Sight adjustment lets you align the reticle perfectly with your point of impact. This makes target acquisition intuitive and efficient under various conditions.
Benefits of Zeroing a Red Dot Without Shooting
After understanding how a red dot sight enhances your aiming speed and accuracy, the next step is making sure it’s properly zeroed before you head to the range. Zeroing a red dot without shooting offers clear benefits. Using a laser bore sighter, you achieve quick initial alignment by matching the reticle alignment with the barrel, streamlining your pre-zeroing process.
This method saves ammunition and time, especially when range access is limited or conditions aren’t ideal. These zeroing methods provide an approximate zero you can fine-tune later, reducing extensive adjustments during live-fire sessions.
Safe Mounting of Your Red Dot Scope
Before you mount your red dot scope, always double-check that your firearm is unloaded and the safety is on. It’s a simple step, but super important.
Next, make sure the scope’s mount matches your firearm’s rail so everything fits securely.
Once you’ve got that sorted, tighten the screws properly and confirm the alignment. This will keep your setup stable and ready for zeroing without any hassle.
Confirm Weapon Safety
Because safety is paramount, you must guarantee your firearm is completely unloaded with the chamber clear before mounting your red dot scope. Engage all safety mechanisms and keep the firearm pointed in a safe direction throughout scope mounting and zeroing.
Secure the weapon on a stable rest to prevent accidental movement. Perform a thorough visual inspection to detect any loose parts or debris that could affect scope adjustment or zeroing accuracy.
| Step | Action | Purpose |
|---|---|---|
| Verify Unloaded | Check chamber and magazine | Ensures firearm safety |
| Engage Safety | Activate safety mechanisms | Prevents accidental discharge |
| Secure Weapon | Use stable mount or rest | Maintains secure mount |
Confirming weapon safety is non-negotiable before any scope mounting or zeroing. Always take your time and prioritize safety above all else.
Secure Proper Scope Mounting
When securing your red dot scope, matching the scope’s mounting footprint to your rifle’s rail or receiver is essential to prevent misalignment. Proper scope mounting ensures reliable zeroing and consistent accuracy.
Follow these steps to secure your scope properly:
- Clean all contact surfaces and mounting plates to remove debris that could cause shifting.
- Align the scope using a bubble level or alignment tool to ensure perfect leveling with the bore axis.
- Tighten mounting screws to the manufacturer’s recommended torque, avoiding over-tightening that can damage components.
- Confirm the scope’s height and position are consistent for quick target acquisition and dependable zeroing.
Aligning Your Red Dot With a Laser Bore Sighter
Although zeroing your red dot without live fire might seem unconventional, using a laser bore sighter offers a quick and accurate way to align your sight.
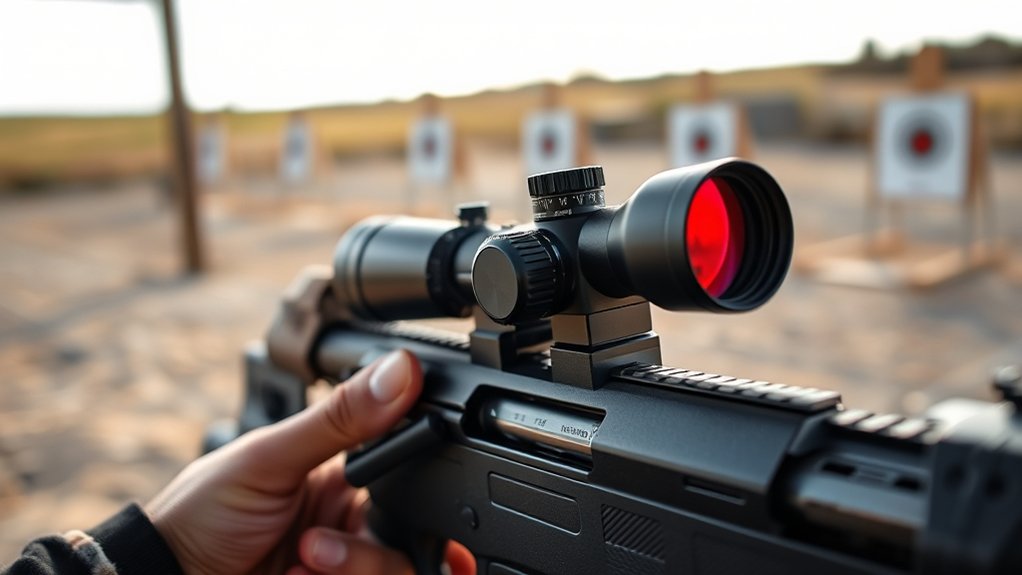
Start by securely attaching the laser bore sighter to your firearm’s chamber or muzzle, guaranteeing perfect centering and stability. Power it on and aim the laser at a target set at a known distance, typically 25 yards or closer.
Attach the laser bore sighter securely and aim at a target 25 yards or closer for precise alignment.
Then, adjust the windage and elevation screws on your red dot scope until the reticle precisely aligns with the laser dot on the target. Check the laser’s brightness and consistency throughout, and replace batteries if needed.
For better accuracy, recheck the alignment at different distances to confirm the red dot remains centered with the laser before moving on.
This method guarantees rapid, reliable alignment without firing a shot. It’s a smart way to save time and ammo while still getting your sight dialed in just right.
Visual Boresighting for Initial Alignment
Start by removing the bolt so you can get a clear view down the barrel.
Next, line up your red dot’s reticle with a reference target or a bore sighter device at close range.
This visual boresighting gives you a good starting point for your zero before you take it to the range for fine-tuning.
Removing The Bolt
Removing the bolt from your firearm gives you direct visual access to the bore. This lets you line up the barrel precisely with your target. Removing the bolt is an essential step in visual boresighting, a zeroing method that helps you get an initial zero without firing.
By opening the chamber, you can inspect bore alignment clearly and make precise adjustments to your sight. This practical approach supports quick zeroing and also helps with firearm maintenance.
Follow these steps for effective bolt removal and bore alignment:
- Ensure your firearm is unloaded and safe.
- Remove the bolt carefully to expose the chamber and bore.
- Look through the bore to align it with a known target or reference point.
- Adjust your red dot sight to match this visual alignment.
Aligning The Reticle
Once you’ve removed the bolt and lined up the bore with your target, the next step is to align the red dot reticle itself. Visual boresighting requires a steady firearm and a securely mounted scope to avoid shifts. Use a target at close range (25 yards or less) for initial visual alignment.
Look through the bore, or barrel, and adjust the reticle until it’s centered on your reference point. Make sure to confirm the reticle alignment from multiple angles to guarantee consistency before moving on in the zeroing process.
| Step | Action | Tip |
|---|---|---|
| 1 | Remove bolt | Safety first |
| 2 | Steady firearm | Use a rest or bipod |
| 3 | Mount scope securely | Check tightness |
| 4 | Align reticle visually | Use close range target |
| 5 | Confirm reticle centered | Check from different angles |
Using A Reference
Although visual boresighting can’t guarantee a perfect zero, it gives you a reliable starting point by aligning your red dot sight with the firearm’s bore before firing. Using a reference target during visual boresighting assures your reticle alignment closely matches the barrel’s bore.
Follow these steps for effective bore sighting:
- Remove the firearm’s bolt and securely place the firearm on a stable supporting firearm rest.
- Clean contact surfaces and mounting surface to avoid misalignment.
- Aim at a distant, visible reference target and adjust the red dot reticle to match the barrel’s bore or chamber.
- Make initial adjustment to the aiming point, establishing an initial zero before live fire.
This method reduces time spent on sighting-in and improves initial accuracy. It’s a simple step that can really help you get on target faster.
Adjusting Windage and Elevation Without Shooting
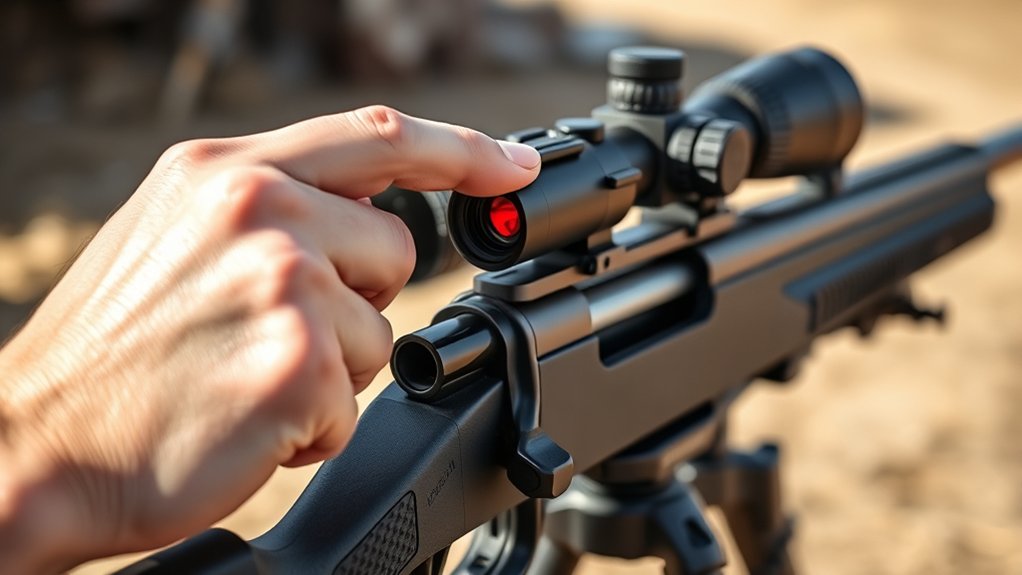
Before you start adjusting windage and elevation without shooting, secure your firearm firmly on a stable rest or bench to prevent any movement.
Use a bore sighter or laser bore sight to align the reticle with the barrel’s bore accurately.
For windage adjustments, turn the left or right screw until the reticle aligns horizontally with the laser mark, ensuring your scope is centered left-to-right.
Next, make elevation adjustments by turning the up or down screw until the reticle matches the laser point vertically.
This process ensures precise aligning of your scope without firing a shot.
After zeroing, perform periodic verification with your bore sighter or laser bore sight to maintain consistent reticle alignment and accuracy over time.
This method streamlines zeroing efficiently and safely.
It’s a great way to get on target without wasting ammo or going to the range right away.
Just take your time and double-check each adjustment for the best results.
Balancing Your Vision for Accurate Sight-In
When you balance your vision by keeping both eyes open while aligning the reticle with your target, you enhance peripheral awareness and improve accuracy. Effective zeroing depends on proper vision alignment, so focus evenly on the reticle and target to create a sharp sight picture.
Follow these balance techniques to optimize your eye positioning and reduce parallax error:
- Keep both eyes open to maintain natural balance and improve target acquisition speed.
- Adjust your head and body posture consistently to prevent misalignment during sight-in.
- Center the reticle steadily on the target, ensuring reticle positioning remains stable in your field of view.
- Practice maintaining even eye focus on both the target and reticle for precise zeroing without firing.
Mastering these steps enhances your balance and accuracy when zeroing a red dot sight. Give them a try, and you’ll notice the difference in your shooting.
Confirming and Fine-Tuning Your Zero at the Range
After balancing your vision and aligning the reticle without shooting, it’s time to confirm your zero at the range with live fire. Use a stable shooting rest to steady your firearm, aiming the red dot at a target set at your desired zero distance, typically between 25 and 100 yards.
Fire a group of 3-5 shots, then carefully inspect the point of impact. Make precise windage and elevation adjustments to bring the shots in line with the reticle alignment.
Fire several shots, then adjust windage and elevation to align impacts with your reticle for precise accuracy.
Repeat this process of firing and fine-tuning until your shots consistently hit the point of aim.
Regular range confirmation guarantees your zeroing remains accurate, preserving the red dot’s reliability. Always recheck your zero after transport or storage to maintain consistent accuracy over time.
It’s a simple step that really pays off in the long run.
Frequently Asked Questions
Can I Zero a Red Dot Sight on Different Firearms Using the Same Method?
Yes, you can zero a red dot sight on different firearms using the same method, like bore sighting or visual alignment. Just make sure the sight fits your firearm’s mounting system properly.
You’ll need to adjust for each gun’s specific characteristics, such as caliber and barrel length.
While the basic zeroing steps stay consistent, expect to fine-tune each setup at the range to achieve precise accuracy for every firearm. It’s really about getting comfortable with the process and making small tweaks for each gun.
That way, your red dot sight will perform well no matter what firearm you’re using.
How Often Should I Check the Zero of My Red Dot Sight?
You should check the zero of your red dot sight like clockwork every 100 to 200 rounds or after any hard knocks or drops. Don’t skip it before important hunts or tactical sessions, especially if you’ve stored or transported your firearm.
Changes in ammo, mounting, or harsh weather mean it’s time to verify. Staying on top of this ensures your aim stays true and your shots hit the mark without a hitch.
Does Ambient Light Affect the Accuracy of My Red Dot Sight?
Yes, ambient light does affect your red dot sight’s accuracy. Bright sunlight can cause glare or wash out the dot, making it harder to see and aim precisely.
In low light, if your dot’s brightness isn’t adjusted properly, it may appear blurry or too dim.
You should use adjustable brightness settings and make sure your lens has anti-reflective coatings.
This helps maintain clear visibility and consistent accuracy in different lighting conditions. It’s all about keeping your sight visible no matter what the environment throws at you.
Can Temperature Changes Impact My Red Dot’s Zero?
Yes, temperature changes can impact your red dot’s zero. When temperatures fluctuate, materials inside your scope expand or contract, which can shift the alignment a bit. Rapid temperature changes can also affect internal components and cause zero drift.
Battery performance tends to drop in extreme cold or heat, making your reticle dimmer and harder to see. That can make it tougher to keep your zero accurate.
To keep your sight reliable, check your zero regularly. Also, try to store your scope in stable conditions when you’re not using it. That way, you’ll avoid surprises when you need it most.
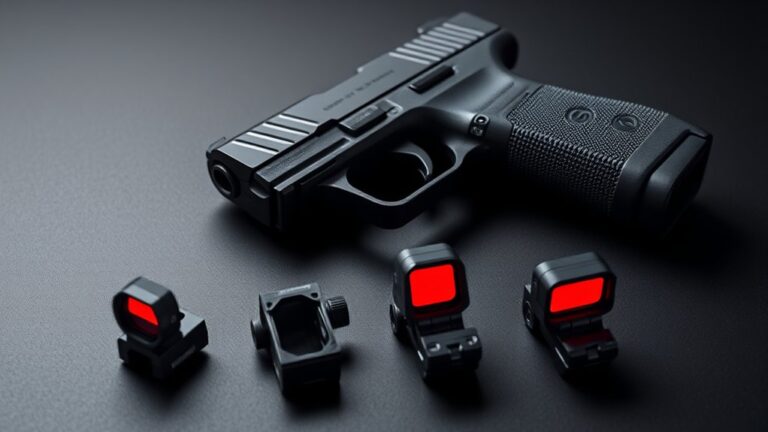
Are There Specific Tools Recommended for Zeroing Without Shooting?
Imagine a bright laser dot shining steadily on your target without a single shot fired. You’ll want a laser bore sighter for precise alignment. It attaches easily and projects a laser beam right where your barrel points.
Optical bore sights, with etched reticles, help you line up visually. Choose kits with adapters matching your firearm’s caliber to guarantee a perfect fit and accuracy.
Always check batteries and calibrate for reliable zeroing every time.
Conclusion
Zeroing your red dot without firing a shot is like drawing a precise map before a journey. It’s essential for accuracy and safety. By carefully mounting your sight, using laser bore sighters, and visually aligning your dot, you lay the foundation for perfect aim.
Remember, fine-tuning at the range will polish your efforts. With these practical steps, you’ll save time, conserve ammo, and hit your target with confidence every time.